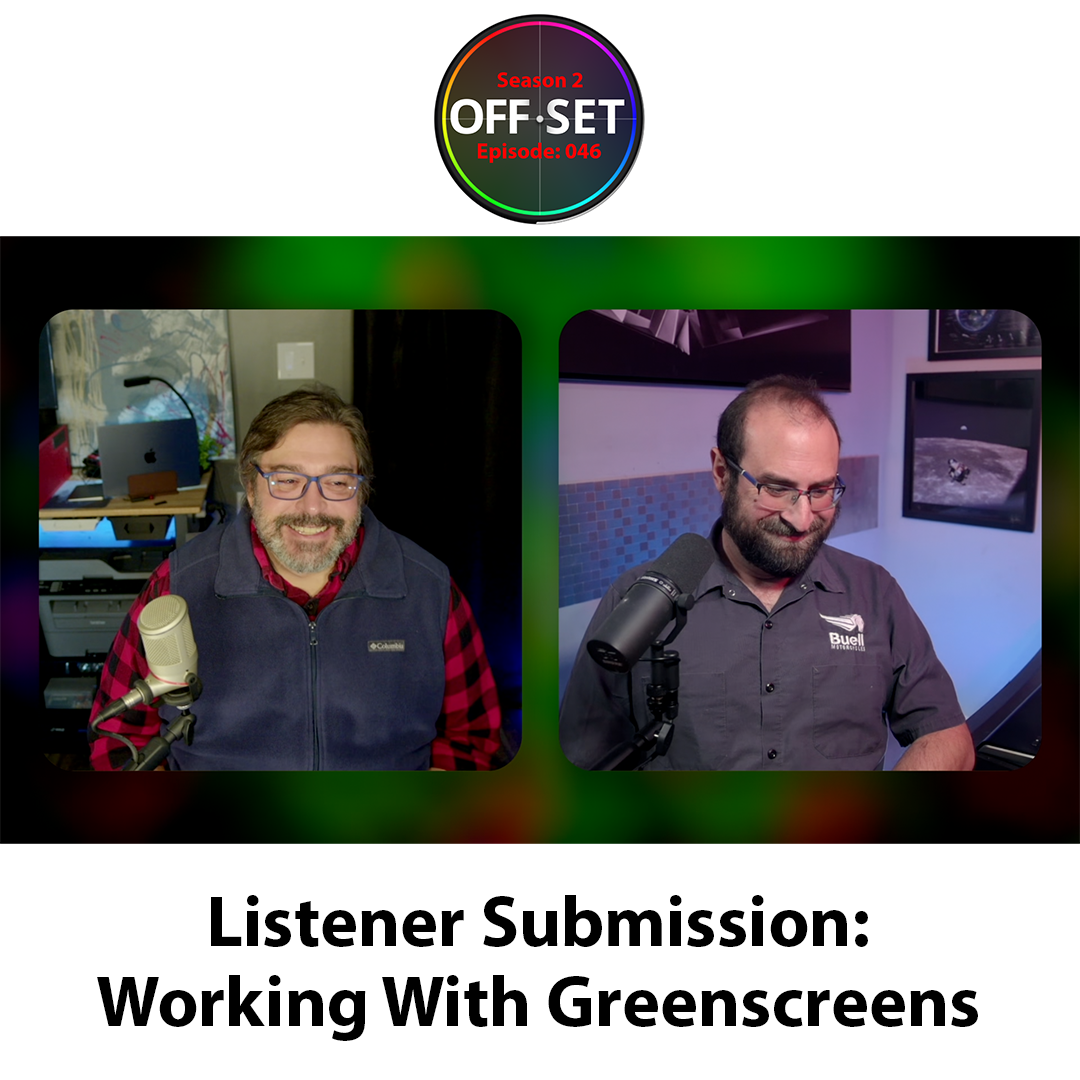
EP046: Listener Submission – Greenscreens
Integrating Greenscreen Work Into A Color/Finishing Pipeline
Happy Holidays!
It’s our last episode of Season 2 and for the year! We’ll return in mid-January 2026 for Season 3 with some great new topics, new types of content and much more.
If you’ve enjoyed The Offset Podcast help us improve it. If you have 5-10 minutes we’d love it if you could take our audience survey by visiting this link: https://wkf.ms/4acQMvb
Thank you to our amazing audience we couldn’t do the show without your support. Wishing you and yours a great holiday season!
————
Continuing our recent efforts to address some viewer/listener submitted topics, in this episode of The Offset Podcast we’re exploring a question we got from audience member Jared about how to integrate greenscreen work into a color/finishing pipeline.
It’s a great topic, and one as you’ll see and hear Joey gets particularly amped up about!
Since we’re a podcast and not a tutorial channel, this episode is more about big picture strategies and techniques then the nitty gritty of particular sliders and knobs, but we still cover a ton.
- Some of the specific topics we explore include:
- Success in greenscreen work starts on set
- Keying on the Resolve Color page vs Fusion page
- Fusion’s Delta Keyer
- Getting more comfortable with mattes and transparency
- Edge refinement, matte finessing and the difference between the two
- Combining keys and using garbage mattes
- Controlling spill with spill suppression
- Light wrap, shadow creation and getting better composites
- Handing off to a VFX professional
LIKE THE SHOW?
If you like The Offset Podcast, we’d love it if you could do us a big favor. It’d help a lot if you could like and rate the show on Apple Podcasts, Spotify, YouTube, or wherever you listen/watch the show.
Also if you liked this show consider support the podcast by buying us a cup of coffee. – https://buymeacoffee.com/theoffsetpodcast
Thanks as always to our amazing sponsor Flanders Scientific and our editor Stella
Thank you!
Robbie & Joey
Video
Links
Transcript
01:00:00:05 - 01:00:16:01
Robbie
Hey everybody, welcome back to another episode of The Offset P{odcast. And today we're addressing a viewer or a listener submitted question about greenscreen work. Stay tuned.
01:00:16:03 - 01:00:34:20
Joey
This podcast is sponsored by Flanders Scientific, leaders in color accurate display solutions for professional video. Whether you're a colorist, an editor, a DIT, or a broadcast engineer, Flanders Scientific has a professional display solution to meet your needs. Learn more at Flanders scientific.com.
01:00:34:22 - 01:00:44:07
Robbie
Hey everybody, welcome to another episode of The Offset Podcast. I'm one of your hosts Robbie Carman. And with me, as always, is Joey. D’Anna. How are you doing Joey?
01:00:44:09 - 01:00:45:14
Joey
Good.
01:00:45:16 - 01:01:06:12
Robbie
I was going to say Joey D’Anna master A.C.E. mechanic. Because you're wearing your Buell shirt, and I know you've been hard at work, at, some motorcycle surgery over the past couple days, but I thought it was a perfect opportunity to mention your mechanic work, because today's topic, today's episode reminds me of being a mechanic.
01:01:06:12 - 01:01:33:05
Robbie
A little bit of green screen work. There's a lot of moving pieces, small parts, technical stuff, that can, kind of, you know, give you success or give you challenges, depending on how you do it. So, yeah, we wanted to kind of, address a question that we got from one of our viewers, our listeners, Jared, about integrating green screen work into their color pipeline, their finishing workflow.
01:01:33:07 - 01:01:52:09
Robbie
You know, and this is a this is a really interesting topic. I think the one thing that we want to just stress at the very top here, this is not a tutorial. This is a podcast. Right? So this is not something we're going to be like okay now move this slider. Now move that slider. Now you know whatever we're we're going to more address this kind of from a conceptual workflow.
01:01:52:11 - 01:02:14:01
Robbie
Big picture level. There's obviously right, right. Joey, a plethora of tutorials out there on the old interwebs that you can get, to learn how to do this better. The color page in fusion. In other places. But this is one of those things where I think once you kind of get some of the big picture conceptual parts of green screen work, then it really doesn't matter where you're doing the work, right?
01:02:14:01 - 01:02:34:16
Robbie
Whether you're in fusion, nuke, After Effects, resolve, whatever. You can kind of go into it armed with some of the baseline knowledge, right. So I just want to be clear about that off the top that this is less about step by step in this particular episode and more, about conceptual stuff. Now, Joey, before we begin, I just want to say we've made it to the end of season two.
01:02:34:17 - 01:02:57:03
Robbie
Man. This is, it's, the last episode of the year for 2025, season. Our seasons run from January 15th to December 15th every two weeks. So we got another. I don't know how the math works out. 24 or 25 episodes out there. This is our second year of, of the show. And I think you'll agree, big thanks to all of our viewers and listeners.
01:02:57:03 - 01:03:17:23
Robbie
They've helped us grow the show this year. We're excited about, 2026 and moving forward, with new episode ideas, new features. We're thinking about, how to grow the podcast, get it into more people's hands. And you guys have been, a large part of making that happen. The podcast has grown significantly in 2025.
01:03:18:01 - 01:03:45:21
Robbie
And we're hoping to do more of that in 2026. Now, to that end, Joe and I realized we don't know a lot about you guys or our audience about what you do. You know, who you are or that kind of stuff. So one of the things that we would love if you could, you know, spare 5 or 10 minutes to do, is that we've created a user or a viewer survey, to help us address, you know, kind of where we're at with the podcast, things that we could be doing better, things that we're thinking about doing, get your opinions on.
01:03:45:23 - 01:04:02:09
Robbie
But also just to get to know you a little bit, as well who our, our viewership is. So if you wouldn't mind, just jumping over to the link and, you can scan the QR code here that you see on screen, to that survey, and we'll, we'll put this on social media in a few other places, be super helpful for us.
01:04:02:09 - 01:04:20:10
Robbie
Again, it's probably about 5 or 10 minutes of your time. I'll just multiple choice. There's no right or wrong. Just go through it, as best you can. And we really, Sure, really appreciate the time spent to do that. It will help us guide, our season three, which will be back January 15th of 2026.
01:04:20:10 - 01:04:37:06
Robbie
We take about a month off, for the holiday season here, just to kind of refresh and recharge your batteries. But we'll be back in mid-January. And we're also pleased to, to tell you that, Flanders Scientific will be back as a sponsor for our third season, which, super big thanks to those guys.
01:04:37:06 - 01:04:53:02
Robbie
They've really helped us out over the, the past couple of years. And of course, you can head over to Flanders scientific.com, check out some of their new offerings, including the X-Men PC, which we'll have to do a whole episode about that particular, lineup in that monitor, because it's pretty exciting stuff they have coming down the pipeline.
01:04:53:04 - 01:05:03:08
Robbie
All right, my man. Well, let's dive into the subject. Roger. Why don't you kind of give us a brief of, the question that Jared posed, and then we can we can dive in.
01:05:03:09 - 01:05:24:15
Joey
Yeah. So Jared said, essentially, he said, I'd love to hear your thoughts on dealing with greenscreen compositing. Is this something you often deal with? How have you refined your processes and any tips on approaching your keying? So yeah, like Robbie said, we want to talk about approaches and strategies. We don't want to tell you what buttons to click.
01:05:24:15 - 01:05:35:08
Joey
But overall, the question and I'm sure Robbie will, will tell you. So do we deal with greenscreen often?
01:05:35:10 - 01:05:50:04
Robbie
Yeah we do. It's, it's it's it's it's become a little bit of a specialty. Now, I will say it's become more of a Joey's specialty. Rob. Just I just go along for the ride on a lot of this. But, you know, the fact of the matter is, that green screen. I mean, we don't have to.
01:05:50:04 - 01:06:16:18
Robbie
I mean, everybody knows what green screen, blue screen is, that kind of stuff, is. But, you know, for as budgets have gotten tighter, location travel, etc. has all getting tighter, green screen and now to a certain extent, also volumetric stages, by the way, have become a, a really, value driven way to do things like interviews, of course, you know, in, you know, big narrative films, green screen has a solid place for VFX work, right?
01:06:16:20 - 01:06:36:16
Robbie
Most of the things that we're seeing in our work as colorists more have to do with stand ups, interviews, set ups, you know, that kind of stuff. I'm a little less on the on the VFX kind of work. But, you know, occasionally we'll get, you know, something like, hey, we got to do a screen replacement on this TV that you know, how to how to, you know, add a green frame on it or a phone or something like that.
01:06:36:18 - 01:06:51:03
Robbie
And you have to kind of combine, some of these techniques. But I agree, man, I think that there's a lot of, lot of real big nuance in the controls here. I think what we want to do is kind of talk about the big picture, and I'll start out and then we can I'll hand it over to you to start diving in.
01:06:51:05 - 01:07:13:04
Robbie
One of the things that I think about green screen all the time is that your success with this work is less about what you do in post-production. I mean, it's obviously important, but it can it really like more than any other kind of production, your success with this is going to start in camera, on set with lighting and all that kind of stuff.
01:07:13:05 - 01:07:34:00
Robbie
And, you know, and there's, again, there's a lot of, there's a lot of nuance to this. But, I mean, I think some of the things, that I would just mention are, hey, good camera choices, highly compressed cameras, you know, low, chroma subsampling, heavy compression, not great for green screen work. Great. You want to shoot, you know, as high quality as you can.
01:07:34:01 - 01:07:53:09
Robbie
Same thing goes with lensing, lighting. Right. Having good even lighting on the background, lighting for the foreground and kind of building that separation out with some depth of field. You don't want to have somebody right up on the screen. And then, you know, also things like wardrobe, right. Like if you're shooting on green screen, having somebody wear a green sweater.
01:07:53:11 - 01:08:14:19
Robbie
Problematic. Right. So there's a lot of production things and some of that you can't solve. So I know for a lot of us, you just get a pile of stuff and you're expected to work your magic. But I think, you know, when if you're consulting with clients about this kind of stuff, hey, giving them a kind of a a cheat sheet or a tip to be successful when they're shooting, is important.
01:08:14:21 - 01:08:30:12
Robbie
And I would also just say that a lot of DP's and camera people like, sure, they can shoot green screen, but there are special a special, you know, special operators, specialists who do this kind of work all the time. If you're doing a lot of green screen work, it's worth the money to hire somebody who's like, yeah, this is my expertise.
01:08:30:12 - 01:08:55:01
Robbie
I do green screen all the time because you'll just in the long run, you'll have a much better, much better go at it. But I think, Joe, the first question I have for you is, okay, so we get green screen work. Where is that? Like, is this something that we should be doing as colorist, or is this something that we're like, nope, this is you gotta go for a VFX person, like in your mind, is it worth a colorist adding this to their repertoire and why?
01:08:55:07 - 01:09:12:22
Robbie
And then I guess sort of a second related question is, is there a sort of a, a line in the sand of where you're like, yep, this is something that's a colorist in a color pipeline, color workflow I can do versus no, no, no, no, I gotta send this off to, to a specialist who does this day in and day out.
01:09:13:03 - 01:09:15:09
Robbie
Let's start with those two. Those two parts of it.
01:09:15:11 - 01:09:43:03
Joey
Yeah. I mean, I think it's definitely something that colorists, if they're interested in this kind of work, should embrace and should learn and should practice. And I actually really enjoy doing green screen coffees. I think it's a it's a fun challenge. Both creatively to figure out how to make it all kind of sell the shot, but also technically to really dial in how to get the perfect detail and to to really impress the client, make it really good looking.
01:09:43:08 - 01:10:08:01
Joey
I love doing green screen work. I think it's just fun. So if you enjoy it, it's a great way for you as a colorist to kind of add some hours and add some billable hours to your project. You know, nobody's going to ask you to do it for free. But like Robbie said, there are some situations where you're going to be like, no, this is too complicated.
01:10:08:05 - 01:10:31:08
Joey
This needs to go to a really talented VFX artist and kind of the first kind of decision, like the demarcation line that you're going to come to when a client asks you, hey, can you do these green screen composites for me? Is that one? So the first thing you look at is the kind of quality of the footage, the complexity of the comp, how much you know, or am I going to need to make the background?
01:10:31:08 - 01:10:49:07
Joey
Do I need to invent the background? Do we need the designer to make a background or is it a photographic background? Look at all of those equations and kind of think what I usually do with my clients is like, hey, send me 1 or 2 test shots. I will give you a quick example of what we can do here.
01:10:49:09 - 01:10:57:23
Joey
If we want to try to do something drastically more complex, then we should start talking about going to a VFX artist. You don't want to surprise a client halfway through being.
01:10:57:23 - 01:10:58:21
Robbie
Like, oh.
01:10:58:23 - 01:11:02:02
Joey
I do the green screen, but actually I can't. Yeah.
01:11:02:02 - 01:11:26:14
Robbie
And I when I, when I look at that footage, I think there's a couple telltale signs that will really kind of guide you on this. This is not a complete list, but a couple things to look for. Well, number one, I'm always looking at the quality of lighting on the screen itself. Right. If you have a dark spot over here and a bright spot over here and a lot of wrinkles and that kind of stuff like that's a cue that this is going to be a little more challenging, right.
01:11:26:14 - 01:11:51:04
Robbie
Same thing goes with like if you have a lot of noise in the image. Right. Because remember we're sampling pixels when we do green screen work. If there's a lot of noise or artifacting or whatever, that going to get in the way of a clean selection of those pixels, you could potentially have some problems. Right? The other, telltale sign for me about success in green screen work is, especially with people, of course, is features right.
01:11:51:08 - 01:12:12:06
Robbie
If somebody has, you know, big, big hair, you know, light colored hair or whatever, that accepts a lot of spill. Like, you see this all the time when people with blond hair, right where they're, you know, getting a lot of that color cast from, you know, the practical lights being used or the background much, you can evaluate these kind of things really, really easily without actually having to do the work.
01:12:12:06 - 01:12:30:12
Robbie
Right. I do agree with you, Joey. Like from a process point of view, even if you've done those evaluations and you're like, yeah, I think I can make this work like a test is always a good, good thing. And I would also say, like when you ask for that test, like ask for the if they if your client can pull out the worst case scenario.
01:12:30:12 - 01:12:53:05
Robbie
And what I mean, yeah, the worst case, the worst case scenario is people gesticulating. The camera moves and has the green screen goes off, you know, off of camera. Now you're looking at a wall like whatever those kind of situations where you might have to involve, you know, some more sophisticated techniques. You always start with the worst case scenario, because then that will make you look like a hero with the good stuff.
01:12:53:07 - 01:13:10:05
Robbie
All right. So let's just assume for a second that you've you said yes, we're going to you've evaluated some footage. And you're like, yep, I think we can do this. I think the first question that I have is that and part of this is honestly is driven by my, let's just call it, as a resolved user.
01:13:10:05 - 01:13:31:22
Robbie
Let's just call it fusion phobia. Right? You know, fusion has been around for, gosh, I'm probably going on ten years now, and it's still one of those toolsets where I'm like, yeah, I'm a little scared of it, right? I personally, I feel like a lot of the time for green screen work, I can accomplish pretty, pretty good results right on the color page.
01:13:31:22 - 01:13:48:16
Robbie
But like, in your opinion, like you got a pile of footage, like, where are you going to start this process? Right? So if you evaluate it, you think you can do it. It's got, you know, you have a good run out of a good quality footage. Are you jumping to the color page first? You know, in the color page, for example, you know, it's different tool sets, right?
01:13:48:16 - 01:14:00:21
Robbie
You got the, you know, 3D keyer in the color page. You got the Delta keyer over in the fusion. There's obviously a lot more matte type tools going on over in fusion. So like where's that demarcation line for you?
01:14:00:23 - 01:14:15:20
Joey
So yeah, like we were kind of talking about earlier, the biggest driver of this is your sources and what you need to do. A lot of people are really surprised when I tell them how much green screen work we do directly on the color page.
01:14:15:20 - 01:14:17:09
Robbie
Color page for.
01:14:17:11 - 01:14:43:21
Joey
The more simple things. It's my preferred way to do it because you can deal with color issues. Really easily. The performance is incredibly, incredibly fast, right? Most green screens on the color page are real time, so if you have a thousand shots that you need to render green screens on, you might not want to lean towards fusion just because of render times.
01:14:43:23 - 01:15:01:06
Joey
However, when you get into something more complicated than what you want to build on the color page, and we'll talk a little bit more about how you can build on the color page. But you'd be surprised how much you can build on the color page. In terms of using the background, adding perspective, doing some cool kind of things to sell the shot.
01:15:01:08 - 01:15:22:13
Joey
But if you need to do a ton of masking, or if you have a really problematic green screen, or if you need to bring in a lot of different elements like the background is something you're going to make yourself or if you need to do something with three dimensions where maybe you're kind of faking a camera move those.
01:15:22:13 - 01:15:28:04
Joey
Yeah, issues where fusion gives you the most possible flexibility.
01:15:28:06 - 01:15:48:18
Robbie
I was going to say, I think I think that where it really breaks down for me in that regard and to be honest, where I hand off to you more of the time is when we start getting, a lot of that, like kind of, more sophisticated tracking needs. Right. Like, especially with. And we'll talk a little bit about this later about, with garbage maps and stuff like that.
01:15:48:20 - 01:16:11:10
Robbie
Perspectives changing lighting like, you know, like, you know, the camera wraps around and does a curve around somebody, you know, those kind of things. You know, that that's, you know, those kind of situations. I think the other question I have about this is, or just conceptually about the choice is, you know, to me, the color page, because as a colorist, the color page makes a lot of sense to me.
01:16:11:10 - 01:16:34:02
Robbie
I'm already used to, you know, in a node based workflow. I have my own color pipeline built. Or if I'm using project Right, like the second you jump over to fusion, those pipelines, while manageable, changing a little bit. Right. Like it's, you know, it's, it's a different in the order of operations. It comes in a different place in the resolve pipeline.
01:16:34:08 - 01:16:51:14
Robbie
So therefore, like if you're not there, a lot of the time, it does require a little bit of, a brain shift, even even if the tools might be more sophisticated, better over in fusion. Like, that's why I usually try first on the color page, because it's sort of like, this is what I already know. This is what I'm already comfortable with.
01:16:51:17 - 01:16:57:15
Robbie
I'm not using the fusion page day in and day out. So it's like, let me see if I can, you know, get started with what I know.
01:16:57:18 - 01:17:20:07
Joey
Two more things about kind of the interaction with fusion color and with keying one other. And this is a big one situation that I almost always jump to fusion for is if the green screen is problematic, or the subject is problematic enough that I need the delta Keyer. A lot of people don't know what the Delta keyer is, so I just want to talk about that a little bit.
01:17:20:07 - 01:17:41:17
Joey
The two kind of big differences between the primary keying tools and fusion color. Now the 3D Keyer from color is available in fusion. So if you want to use the 3D Keyer in fusion, you're welcome to. But the 3D Keyer is an amazing green screen killer. It does beautiful work with edges and spill suppression and go out of the box.
01:17:41:17 - 01:18:04:06
Joey
The 3D Keyer does a better job on green screens than most killers I've used. Where I want to go to the Delta Keyer is a couple of specific kind of scenarios, and I want to back up a little bit here and kind of say, what is the delta here? The delta here is exactly what it sounds like. It's a killer that works based on delta or differences.
01:18:04:06 - 01:18:22:15
Joey
So this confuses a lot of people because they usually just drop the delta keyer on there. They heard the delta key is awesome. They drop it on there, they sample their green and it looks like garbage. And they're like, what did I do wrong? The Delta keyer is not just sampling the color of the screen. The Delta Keyer is expecting what's called a clean plate input.
01:18:22:20 - 01:18:41:07
Joey
This is your green screen without anybody in front of it, right? And then it takes those two streams and makes a key from it. Now you might say, I don't have that. I don't have a clean plate. We didn't shoot one. If you're shooting lock down it's very useful to shoot that clean plate natively.
01:18:41:07 - 01:18:42:01
Robbie
Yeah. It's like it's like the.
01:18:42:01 - 01:19:03:13
Joey
Equivalent of you got into the delta key or here's a clean plate that works amazingly. However, there was another effect in fusion called the clean plate effect that will take all basically all the green from your green screen and throw it inside to like envelop the subject. It makes a really weird looking image, but you feed that into your delta keyer as the clean plate.
01:19:03:15 - 01:19:31:12
Joey
And the result of this is it's kind of taking the green just itself, but with all of its imperfections. So if the green screen is uneven, the delta here does a great job dealing with it. Or and this is the big one, someone with big, frizzy hair that lets a lot of green through little holes in it. The Delta Keyer does a thousand times better job with that exact, specific scenario than any other keyer I've ever used.
01:19:31:12 - 01:19:52:10
Joey
So if you grab someone with super frizzy hair, compare the three to here and a good set up on the Delta, or you're going to go with Delta Keyer every time. So that's like that's the demarcation line for me. If it's an uneven green screen or a frizzy hair that needs a lot of detail, or frizzy clothing that needs a lot of detail, Delta Keyer all day long.
01:19:52:12 - 01:20:00:00
Joey
Other than that, I do tend to gravitate towards the color page because it's more familiar and it's more real time and faster.
01:20:00:02 - 01:20:18:05
Robbie
You know, the thing that you just mentioned about the clean plate is interesting. I didn't realize, first of all, I didn't realize that, that's exactly how that how it works. Plus, I didn't realize the clean plate effect to build it from if you don't have that. But it reminds me of, like, you know, an audio production, an audio guy, capturing room tone.
01:20:18:07 - 01:20:18:16
Robbie
Right?
01:20:18:16 - 01:20:20:07
Joey
It's exactly the same thing.
01:20:20:09 - 01:20:38:15
Robbie
Why wouldn't you capture that? You know, clean, just so you have it, you know, just so you just representative of, you know, the scene, I think it's super powerful. So keep that in mind when you're talking to clients as well. Be like, hey, you going out doing a production? Make sure you record, you know, a minute or so of just nothing but the green screen.
01:20:38:21 - 01:20:41:09
Robbie
That'll be helpful. Possibly helpful down the road.
01:20:41:11 - 01:20:53:05
Joey
Yeah, absolutely. And it can be a single frame, right. If, if as long as the camera's locked down and doesn't change perspective, like if someone walks away from the green screen that there's a clean plate, you know, you're ready to go.
01:20:53:11 - 01:21:25:14
Robbie
I think the other thing worth mentioning at this, at this stage, no matter whether you're in the color page or in the fusion page, is that you do have to get a lot more comfortable with the concepts of matte work and transparency, right, and how those can be piped around various parts of the interface because like if you're new at this, you hear me, hear me, or hear me out for a second, you've probably done something similar to, okay, I'm going to go onto my edit page timeline, and I'm going to stack two clips on top of each other.
01:21:25:14 - 01:21:47:17
Robbie
Right? I'm going to put the background on video. Track one, the foreground on video. Track two I'm going to key video, track two in the color page. And then I'm going to add an alpha output on the color page pipe that. So now I've built a composite right. And like there's nothing wrong with that but it show it's you know I'm guilty of that all the time.
01:21:47:17 - 01:22:10:17
Robbie
But it is one of those things where it's probably the lowest, the lowest sophistication method of of doing that work. I think one thing that as you get better and more comfortable with this, start starting to understand that any node really in the color page or fusion can potentially pipe out a matte image to work with and that kind of stuff.
01:22:10:17 - 01:22:31:11
Robbie
And so like you just need to get a little bit more conceptually comfortable with, you know, cause, with how amount works, how edge refinement works, how transparency works. Because then you can start seeing the puzzle pieces of how those various things to go together within the constructs of a node tree, either on the color page or on the fusion page.
01:22:31:16 - 01:22:50:07
Robbie
And I'll be honest with you, that has been the, for me, getting better at green screen. That's been the hardest challenge going. Oh, wait a second, you used a color generator that was masked off to do this matte or whatever. Like those kind of things conceptually just require a little bit more thinking than you're probably used to.
01:22:50:09 - 01:23:11:07
Joey
Yeah. And, you know, that's another kind of one of those fundamental questions you're going to ask yourself when you approach a green screen project, whether it's do I use color or fusion or some other program, doesn't matter. The next kind of thing you want to think about is how do you actually arrange this in the software? Because up to this point, we're just talking about doing the key itself, not a whole composite.
01:23:11:12 - 01:23:32:22
Joey
So do you do what Robbie just described and put the background on V1 in your edit page? Then make a cable clip with fusion or color on top to make your comp. That's one way to do it, like everything else that we've talked about or we'll talk about, there's pros and cons to each one of these approaches, and you need to tailor it to your project.
01:23:32:23 - 01:24:02:17
Joey
Did your client give you an edit of backgrounds? If they did, this is a real easy way to get started, because you could just lay all the backgrounds in and just go shot to shot and work on the keying. However, the downside here is if you build your composite outside of fusion or color, you lose some ability to work in kind of the three planes of the green screen, which is I can color and texture affect the background.
01:24:02:19 - 01:24:26:13
Joey
I can color and texture affect the foreground, or I can color and texture effect all of them together. So all of those things, when you start building your comp, you're going to realize, oh, I need to match the color between the foreground, the background. I need to maybe darken the background a bit to bring the foreground out. Then maybe I'll throw a vignette and some film grain on the whole comp together to really sell the shot, right?
01:24:26:16 - 01:24:41:08
Joey
Those things, those details get harder when you've separated it on the edit page. So the next logical question is, well, how can I put the background in my comp if I don't put it on the edit page?
01:24:41:09 - 01:25:06:21
Robbie
That's a great question because the way I would like, I always think about node trees, whether in the fusion page of the color page as a single shot specific. Right. It's not like I you wouldn't think of a node tree as, hey, here's a node tree simultaneously dealing with two or more shots at the same time. But that's why I mentioned the matte stuff and then that kind of stuff earlier, because you actually can do that.
01:25:06:23 - 01:25:30:00
Joey
Yeah. And this is where this is where a lot of people kind of, again, they get surprised when I show them some of the greenscreen setups we've built on the color page, because they don't realize you open the media tab on the color page, drag in your background. Now you can comp your background using layer mixer nodes right in the color page, which means you basically can have a stream on the top of your green screen, a stream on the bottom of your background.
01:25:30:00 - 01:25:47:21
Joey
You can arrange color effects, blurs, whatever on the background. Combine them with a layer mixer, and then on the output side, after they're combined, you can color them together, but you can also still in the same node tree. Color them separately. Now, could you go back on the edit page and jump back and forth between clip to clip?
01:25:47:22 - 01:25:52:21
Joey
I'm going to darken the background a little bit. I'm going to brighten the foreground a little bit. Maybe I'll throw another layer on top of the whole thing.
01:25:52:21 - 01:25:54:08
Robbie
You can compound it. You can do.
01:25:54:08 - 01:26:15:01
Joey
All sorts of that. Yeah. That's not that's no fun. It's like it doesn't it's not conducive to creativity because you're jumping around. Now, the last thing I want to mention on this is that's all on the color page. If we want to do our comp on the color page background foreground using an external matte, and it's a great way to work.
01:26:15:01 - 01:26:35:23
Joey
But let's say this is one of those situations where, hey, I'm on fusion page. I needed to do some really complicated masking. I still want that capability. I still want to be able to grade both the foreground and the background and them together completely independently on the color page, using the color tools I'm familiar with on the fusion page.
01:26:36:01 - 01:26:54:01
Joey
You can always. And this is another thing that people just don't always realize when they're just getting started. If you make a second media out node on the fusion page, feed it the matte from whatever you're using the key, just the matte, not your whole comp. And then you go back into the color page. Right click on your node tree add source.
01:26:54:03 - 01:27:12:12
Joey
Now you have a matte that you can feed into the key input of any node. So you can do the comp work in camera space on the fusion page with the background all together. Then jump to the color page and still use your matte that you built in fusion with the fusion tools to do all your color work.
01:27:12:12 - 01:27:27:05
Joey
So if you do a green screen composite in fusion, don't think that you are tied into color matching and color grading that comp only on the fusion page. You can bring the mattes over to color. Yeah.
01:27:27:05 - 01:27:49:12
Robbie
You're connecting. You're connecting the two pages together. Yeah, yeah, yeah. It's it's interesting that that's, that's that's more of the workflow. I meant about kind of combining the two, pages together. I guess my question related to that was, what do you see the advantages of doing that? Matte work and fusion page and then piping it over to the color page?
01:27:49:15 - 01:27:58:08
Robbie
Is it just more sophisticated? Compositing tools are available over on the fusion page. And obviously the color page has better color tools. Is is that simple?
01:27:58:10 - 01:28:17:17
Joey
It's that simple. And also the color page has the advantage of using your control panel. Yes, there's a lot of color tools in the fusion page, but they're all kind of mouse and pointer and stuff. Yeah. I'm going to go to the color page where I'm most familiar coloring, do my color nodes. And it's just a it's an easier way.
01:28:17:19 - 01:28:20:00
Joey
So if you're doing your comp and fusion.
01:28:20:02 - 01:28:40:19
Robbie
Let's just recap, because we we've talked about a lot so far. And I just it can get a little confusing. So I just want to just real quick recap of the kind of this the strategies. Number one, we could start, you know, as simple as possible. On the edit page, layer things up key something on the, you know, on the page, you know, either on the edit page or the color page, add an alpha, you know, alpha output.
01:28:40:19 - 01:29:00:13
Robbie
Just combine those two. But it's a lot of jumping around, right? You're going back and forth between the two different clips. If you compound those, then you have another layer you're dealing with of of complexity. Right. So we can do this all on a color page node graph by adding in external mattes, which I don't, as you said, can be your background can be an external matte.
01:29:00:15 - 01:29:23:01
Robbie
You can have you can use media and combine multiple clips in the same node tree, all on the color page. To do that. You could do that exact same thing solely on the fusion page. Or you can but combine the two. You could do your matte and key work on the fusion page, and then pipe that over to the color page as a new input to then continue doing your color work with the combined composite.
01:29:23:01 - 01:29:31:08
Robbie
So you really have some choices of where you're most comfortable and what you know, you know, workflow practices are going to best match the project itself.
01:29:31:10 - 01:29:51:21
Joey
Yeah. And to go back to the edit page example, there are times where you do want to keep the background in foreground completely separate. For example, if you have a project where you need to render individual clips back to the client for them to reassemble and edit, the only way to do that is to keep your background on a completely separate clip that you're only using for kind of pre visualization.
01:29:52:01 - 01:29:59:13
Joey
So like I said, kind of early on, there's no there's no one rule about any of this. It's all okay. Every project I.
01:29:59:13 - 01:30:22:03
Robbie
Get it I get it. So so if we have this big picture things out of the way, let's talk about some of, the specific, I think, challenges that people run into with Keane. Right. Obviously the first one is edge refinement. A Keane is all about edge refinement. How smooth that edge looks like, how, you know, how much detail, you know, you don't want to give somebody a massive haircut, right?
01:30:22:03 - 01:30:39:14
Robbie
Just because you can't get, you can't get a good edge to it. So 3D here, obviously we have some, you know, all the keywords on the color page. You have some edge refinement, you know, blurring, you know, shrink aggro of the mat. Denoising of the mat, that kind of stuff. I'm guessing just like everything else.
01:30:39:14 - 01:30:44:15
Robbie
There's some more sophisticated options for that kind of thing over in the fusion page. Right?
01:30:44:17 - 01:31:09:12
Joey
Yes, there is, but there's some of those options also exist on the color page as well. What I want to say conceptually to anybody thinking about edge refinement on your keys, edge refinement is for the edge okay. And what I mean by that is whether you're on fusion or call or even in After Effects, the goal of using any edge refinement tool is to get a good edge.
01:31:09:13 - 01:31:34:15
Joey
It is not to fix problems in your work with the key. So for example, somebody wearing a green pin on their shirt okay, you can get away with cranking the fill white or the clean white up until that's a solid and you've now ruined your edge. But you've got a done key. Great. No, no. Use your edge tools for the edge.
01:31:34:21 - 01:31:44:06
Joey
And if there are other problems, bring in a power window to track that little pin that's on their their, shirt, for example. Right.
01:31:44:06 - 01:31:44:17
Robbie
I think that's.
01:31:44:19 - 01:32:08:21
Joey
Who's the tool for what. It's what it's for instead of trying to overdo the edge refinement. So another thing you can do is combine multiple garbage match or combine multiple keys. Again this is completely page or software independent. You look at your green screen, you're refining the edge. I can get the hair exactly right, but it's messing up their shirt in their arms.
01:32:08:21 - 01:32:20:20
Joey
Or I can get their clothing exactly right, but it's giving them a haircut. Well, you don't need to have it all on one node. Do a mat that splits their their head. That has one key on their head.
01:32:20:21 - 01:32:21:18
Robbie
Somebody. Yeah.
01:32:21:20 - 01:32:44:05
Joey
And then do an outside node or invert or another mat or whatever, whatever your software calls it, and do a different key for the body with different edge refinement rules. People get really caught up in making the entire image work with one effect, even if like, okay, I've seen people try to like crank up these edges, find it tools to clean up stuff.
01:32:44:07 - 01:32:56:18
Joey
You know, garbage on the outside of the edges, like know if there's noise on the edge of the frame or there's some lens vignetting. Who cares? Power window, the whole thing. So you're only dealing with the edge with your edge tools?
01:32:56:20 - 01:33:16:05
Robbie
I think it's a it's a it's a gem of knowledge. What you said. It's so simple. I never thought about saying it that way, but use the edge tools for the edge, not for the key, because I think that I'm guilty of that from time to time. Right, drew? You know, clean, black, clean, white, whatever. It's just trying to get like and that, that's that, that, that seesaw back and forth.
01:33:16:05 - 01:33:34:02
Robbie
Like it can work sometimes, right. Like, yeah, sure you can. You maybe get lucky and clean up the key and refine the edges at the same time. And it's acceptable. But that back and forth is the real challenge for there. If you're not, if you're not, if you don't realize what those edge tools are, they're not a solve for the key necessarily.
01:33:34:03 - 01:33:58:21
Robbie
They're solved for refining the the edge, which I think is great. Now let me let me ask you this because you mentioned garbage mats and I think that's a that's, an edge type issue. You mentioned a couple different scenarios on it, but if I separate it out where like the edge tools that we mentioned are for the edge things like garbage mats are a way of dealing with problem problems of the key is that is that a good way of saying that?
01:33:58:21 - 01:34:16:17
Robbie
Like whether that's like the screen off the edge, whether it's like the, you know, you want to do a hold out for something on maybe on somebody's body that is getting keyed by accident. It could even it could even be for it. I can get this perfect. Except for the side of their head. I can just put a garbage mat around that, that kind of thing.
01:34:16:17 - 01:34:27:16
Robbie
So garbage mats are for, like, sort of filling holes or masking off problems of the key. Not really for and cleanup at the edges necessarily.
01:34:27:18 - 01:34:50:09
Joey
Exactly. So you know, one example that we just talked about is there's some lens vignetting around the edge of the screen. So your key is perfect in the middle. It's perfect for everywhere that there's a key edge right. Why would you refine that key anymore if it's perfect everywhere you need to see it. Yeah. Why would you refine that more to make it work with the vignette green screen?
01:34:50:11 - 01:34:51:00
Robbie
Just so your.
01:34:51:00 - 01:35:01:17
Joey
Subject never walks in front of the vignette? Yeah, the only thing they do that's another problem. But yeah, I was gonna say in most cases the green screen extends beyond where you need to key.
01:35:01:19 - 01:35:18:05
Robbie
Yeah. And this is this is harkening back to the beginning of our conversation about this, where I think the evaluation and understanding, like actually being familiar with the shots, because what I find in those situations, right, is that like I get the key. Perfect. I add a garbage mat. But then I didn't really watch down the clip the entire way.
01:35:18:06 - 01:35:43:16
Robbie
And their hand about halfway through. I see some of these arm just get cut off in the middle of the shot, right? Because they then hit the garbage mat on the side of the frame, and all of a sudden their wrist like, you know, got cut off by something or whatever. So it's also important when you're doing that kind of those, those bulk fixes with like garbage mats or multiple keys that you have to go through the entire clip to, not just a couple of frames on it to make sure it's right, you know.
01:35:43:18 - 01:36:08:02
Robbie
So no. So now that we've kind of defined edge versus bonk, let me ask you a couple specific edge questions because I think if we if we now know that we're not trying to fix the key necessarily with the edge, the edge refinement tools, but just as edge, I think the first place that I always start is like, what level of detail do we need to have on?
01:36:08:07 - 01:36:30:14
Robbie
Because I, in a perfect world, it's 100% detail, right? And, you know, it's perfectly crisp. You're not losing a strand of hair, but in the real world, like we can cheat that a little bit. Where is the, where's the belt? Is it just a matter of. Yeah, that looks good. Or are you looking at something specific when you're starting to to adjust edges of.
01:36:30:15 - 01:36:34:22
Robbie
Yeah. I don't want to lose this kind of detail or this type of thing.
01:36:35:00 - 01:36:55:15
Joey
It really is, for the most part, in my opinion, kind of what works and what looks good. However, the one thing I will say every time you're doing that edge refinement, you're tweaking, maybe you're doing some denoise, you're doing a little bit shrink, you're doing a little bit of grow. Whatever it is, every time you think this looks good, I'm really liking this direction.
01:36:55:17 - 01:37:16:05
Joey
You need to go to that highlight mode, and you need to not only go to the highlight mode, go to the highlight black and white mode. If you're on the color page and look at that matte at 100% high contrast, because you might be introducing a haircut somewhere where you didn't expect it, you might be adding a hole or removing a hole where you didn't expect it.
01:37:16:05 - 01:37:39:23
Joey
Especially okay, women with dangly earrings. Yeah, that earring can sometimes kind of move close to their face or be solid and then a hole. And it can, if you add too much like shrink mat shrink, you can make it so like depending on where they swing their head, their ear might look a little weird and flickering. Right. Those issues, once you kind of get it visually where you want, don't just trust that.
01:37:39:23 - 01:38:02:23
Joey
Look at your mat in high contrast and verify trust, but verify right? It will give you an indication. Now again, no hard rules here. If the final image looks great, you know it doesn't really matter exactly what the high con matte looks like, but the high con matte is a great way to spot little things that you can get better that you might not see when you're looking at the whole comp.
01:38:02:23 - 01:38:27:06
Robbie
That's a that's a good one. Yeah. And I've noticed that I tend to and I think part of it is because I'm guilty of trying to use edge refinement tools sometimes to fix, fix larger, bigger key issues. The one that I notice all the time is like the Halloween effect that happens with some of the cleanup stuff in the denoise, right where you'll get a little bleed through on those edges.
01:38:27:06 - 01:38:53:16
Robbie
So like you're improving the key, but at the at the detriment of the, the clean edges. Right. And so like I, I that's the best thing you've probably ever said on the podcast about thinking about those two differences. Right there. Let me also ask you this. When it comes to edge refinement, I think the bigger the biggest one that can, you know, depending on the shooting situation, can be really straightforward or it can be really difficult.
01:38:53:16 - 01:39:13:07
Robbie
Is the spill that happens, and how to deal with spill suppression and that kind of edge issue. So just so you everybody's familiar with what I mean is that you go and shoot somebody on a green screen and let's just say they're fair skinned or they got blond hair or whatever, or maybe they're too close to the actual green screen, or the lighting's too strong.
01:39:13:09 - 01:39:33:09
Robbie
You can get some spill or some reflectance from the background onto the onto the subject in the foreground. And it kind of just looks nasty, right? You got to get this green thing. Now, obviously most killers are going to have something called spill suppression. What is spill suppression? What's the goal of it? When should do you always use it.
01:39:33:15 - 01:39:37:06
Robbie
What like what's that like what is the best practices for that.
01:39:37:08 - 01:39:59:09
Joey
Spill suppression is exactly that. It's looking for the the screen color. So you usually have to tell it what color it's looking for. And it's kind of doing almost how the color compressor works where it's pushing towards, it's kind of pushing the hue and saturation towards another color, but it's doing it specifically to the opposite color of your screen.
01:39:59:11 - 01:40:00:17
Robbie
To eliminate it. Yeah.
01:40:00:19 - 01:40:30:05
Joey
This works better than trying to manually do that with curves or with a primary grade almost every time. Don't be afraid of spill suppression built into 3D keyer. It's built into the Delta Keyer if you're using it there. However, sometimes it's too much. You can always dial it back, and sometimes it's not enough. There are also effects built into resolve that is the same spill suppression, but external.
01:40:30:07 - 01:40:46:09
Joey
So if you take that, put it in another node after your key, feed it your matte so you don't want to spill. Suppress the background in most cases, right. So feed it your matte. You can add more spill suppression if you need more. Usually that's not the case. Usually if you add too much they end up looking a little burnt.
01:40:46:11 - 01:41:15:15
Joey
But it's funny in the delta here, the options for spill some really like the preset options for spill spill suppression are like I forget the exact wording, but it's like rare medium rare bird. Yeah. But in general, spill suppression is the first place to look for fixing that. And then you can also do additional color correction to kind of bring the background of the foreground together, like if you were in if you're comping them into a really warm environment and they were lit, cool.
01:41:15:17 - 01:41:28:15
Joey
You're going to want to warm them up in color, right? But you're going to want to do that to them without green on their face. So spill suppression first, then color correction to match the background in the foreground.
01:41:28:17 - 01:41:47:04
Robbie
Yeah. Yeah okay. That makes sense. And I've had I've had really good luck with the 3D here. Spill suppression. Like it can work very good. It can work some pretty good magic. But like I you're right there's other there are other tools available for that. Now one of the. Well so let's say you got all of this stuff down like you're getting pretty good results.
01:41:47:04 - 01:42:07:19
Robbie
You refined your edge and again, there's levels of sophistication for for this as we've talked about. But the one thing I think everybody who's ever heard or done some greenscreen work has heard from their clients is something I'm paraphrasing here, but it's something like this. It looks like he's the person is just like sitting on top of the background, right?
01:42:07:21 - 01:42:28:01
Robbie
It's just like you got a perfect key, but now it still looks like you have two disparate images, right? You have the background and then you got the person keyed, but they don't really look like they're part of the same entity, the same the same thing. Right. And I think that that's a common complaint where it's just like, yeah, that looks like it was green screened.
01:42:28:07 - 01:42:50:17
Robbie
Right? And it's just like, how do we get that? So I know that there are a number of strategies about this. You know, one of the sort of as a side note, this is one of the reasons that I think volumetric stages have taken off so well for this kind of thing, because you can really integrate somebody so much better into a background in a volumetric setup, with a screen behind them.
01:42:50:17 - 01:42:53:07
Joey
So why do you think that is?
01:42:53:09 - 01:43:14:06
Robbie
Well, it's because of the natural spill that happens with and like the way that the light wraps around. I'm using a pun here, right? The light raster kind of somebody and then interacts with that back and goes both ways. Right. The foreground lighting hitting the background in the background lighting, it's more of the background kind of wrapping around the person as you if you're looking at somebody.
01:43:14:06 - 01:43:34:02
Robbie
Right. If you're looking at somebody standing on a street corner, right, you're getting the photons from that person, obviously, but you're also seeing the photons as they come from the background and kind of wrap around that person. And it makes it feel like, oh, this is one plane. This is one integrated thing. So I mentioned I was joking, but light rap.
01:43:34:02 - 01:43:45:09
Robbie
What is a light rap? Why is it kind of, a key component, pardon the pun again? Really of really selling an integrated look.
01:43:45:11 - 01:44:04:07
Joey
Yeah. And that's kind of on the overall level. Right. The idea here is to sell the shot to make it not look like it's somebody cut out and paste it on top. First layer of that is color matching, which any color should be familiar with. Make them feel like they're in the same color and lighting. Great. We can do that.
01:44:04:09 - 01:44:31:00
Joey
Second part of that is texture. If there's one is really noisy and one's really clean, maybe denoise the one that's noisy. Or if you want some film grain, do some film grain across the whole comp. But like you said, the reason why volumetric stages look so good is because the actual background helps to light the subject, and we can emulate that in our greenscreen with something called a light rap.
01:44:31:03 - 01:45:05:23
Joey
Now all a light rap is is essentially taking the background and bleeding it into the foreground, around the edge a little bit in a soft and pleasing way. So if there's you know, a bright blue background, you're going to emulate a little bit of blue coming in to your subject. This is shockingly easy to do when you start thinking about things in kind of a node based environment, like fusion or color, because you've got the ingredients right, you've got the background.
01:45:06:01 - 01:45:29:18
Joey
Now let's go way back. This is another one of those reasons why it's really nice to have your background in your comp, not separate on the edit page, because it's really hard to do a light rap if it's separate on the edit page. In fact, there's really no good way to do it. But if you have your background inside your comp in fusion or in color, so you've got your background, you've got your foreground, and now you have a matte, right?
01:45:29:18 - 01:45:52:00
Joey
You have at some point in this tree that you've built, built a really good matte that is giving us the exact edge of our subject and our foreground. So we can use that to take some of the background, combine it with some of the foreground just around the edges. Now the first thing people think is like, yeah, but I don't want to have it hit the whole foreground.
01:45:52:00 - 01:46:06:02
Joey
That's going to look ridiculous. It is. How do we get just those edges? Simple math. Take your high contrast matte, break it out to another node. Again, this is fusion nuke. After effects.
01:46:06:07 - 01:46:07:01
Robbie
Yeah.
01:46:07:03 - 01:46:37:07
Joey
Any any software. This we're going to do just with resolve. But you take your mat okay. Then you take on another stream your matte inverted, you blur one of them and then you combine them with a difference mode. So essentially you're subtracting the blurred one from the solid one or vice versa. The idea being you're taking the blur and pushing it inside where your foreground is and giving you just a visual matte of the edge.
01:46:37:08 - 01:47:00:23
Joey
Then take your background added as another layer as usually, and add blending mode of really low opacity and use your matte to limit that layer. So essentially all we're doing is we're taking the matte, we're converting it to just an edge, and we're giving it a little bit of blur, softness on the inside. And then we're using that to comp the background back on with the tiniest bit of opacity.
01:47:01:03 - 01:47:25:03
Joey
And there's a couple things that you can kind of play off each other, right? You can play off the opacity. First and foremost is the overall strength or the strength of that blur between those two inverted matte layers to kind of show how much I try to modulate, how much that light wrap protrudes inside your foreground. So it's one of those things, and it's not appropriate for all comps, right?
01:47:25:03 - 01:47:50:09
Joey
Because if the background is massively further behind someone in kind of theoretical space, it's going to have way, way, way less, light impact on your subject. And that's one of those areas where LED stages are actually harder to do, because let's say the background is supposed to be massively far away. That wouldn't have as much spill on the subject, and they have to light accordingly.
01:47:50:11 - 01:48:09:06
Joey
So it's kind of think about what would sell the shot. Would this the environment that they're in, if it's super bright and futuristic and stuff. Yeah, it's probably going to spill a little bit onto them more, give it a little bit more light rap. If it's a mountain super far away in a dark scene, probably less light rap or no light rap.
01:48:09:06 - 01:48:32:00
Robbie
One of the things I think about the privies of this part of things too, is that it doesn't. And I've seen this problematic a lot with specifically with integration with light rap, is that people, don't really go into green screens with an idea of what, oftentimes what they're going to composite. Like, they go like, oh, we'll just kit and then we'll add in this thing, you know, later.
01:48:32:00 - 01:48:57:07
Robbie
I do think it's important just to say again, that if you know in advance, generally what you're going to see behind something that can give you a real leg up in how you actually light the green screen, you know, as well. Right? If you're putting somebody, you know, on, a beach in the Caribbean, right. Like you might go, hey, listen, we're going to light this person a little warmer, a little more yellow, red, whatever.
01:48:57:07 - 01:49:12:18
Robbie
Like, but you know, you know what I'm saying? Like, you have some creative choices because that's that's the hard. Like you're right. The light rap helps integrate the two layers. But that's not to say that, you know, you mentioned you mentioned this about color matching. Like I actually find that's like that's a big part of it too. Right.
01:49:12:18 - 01:49:17:14
Robbie
Like if somebody just looks they're on a beach, but they look pale like what's going on there.
01:49:17:15 - 01:49:19:23
Joey
The most overall dramatic thing. Yeah.
01:49:19:23 - 01:49:28:16
Robbie
That looks weird. Right. So these things like light rapid rubber help sell it. But there no substitute for kind of trying to get the two elements kind of in line to begin with. Right?
01:49:28:18 - 01:50:00:15
Joey
Yeah. And the last thing I'll say in terms of kind of selling the shot, think about adding a little bit of dimensionality, as in maybe your background isn't exactly the right perspective. Give it a little corner pen to make it kind of better. Or give it a little bit of fake depth of field by tweaking a lens blur, or even do a little tiny camera move where the subject like if there's a little kind of push in, maybe you can add a little push in where the subject is pushing in a little bit more than the background.
01:50:00:20 - 01:50:14:04
Joey
So it looks like it has a little bit of perspective. Not right moving project, but you know, it's just something to think about. Think about the fact that you can manipulate this background more than just I'm plopping this person on this done background.
01:50:14:06 - 01:50:35:22
Robbie
Yeah. And movement and movement certainly helps as well. The other thing I related to this, I was going to say that goes along with late rap, and we've done a lot of this because we've done a lot of stuff that's like stand up to camera, like presentation kind of stuff, you know, you know, if you think about somebody standing, let's just say, I don't know, maybe something super simple like a white psych environment.
01:50:35:22 - 01:50:59:00
Robbie
Right? So, you know, white space can be hard to get, right? So a lot of people should shoot those green screen, but then they put a, you know, a simple white background or a colored background behind, naturally, when somebody, especially if they're full figured, like they're all, you know, head to toe in the shot, like just standing there on that stage, you're the person themselves is going to cast a little bit of a shadow on to the background.
01:50:59:00 - 01:51:21:03
Robbie
It happens naturally, right? If you're standing again standing somewhere and like somebody is lighting you, there's gonna be natural. So I think along with light rap, one of the things that I've seen you do really successfully, and I've really liked how it looks, is adding a little bit of fake shadows into the scene as well, like the the foreground element itself, casting a shadow into the fake background.
01:51:21:05 - 01:51:24:23
Robbie
Similar approach to Light to Light rap. But explain that a little bit how that works.
01:51:24:23 - 01:51:59:11
Joey
Yeah, exactly. You're just you when you're looking kind of ways to sell the shot, think about ways you can reuse the matte you've already made. But if it is like a stand up shot, take that matte corner, pin it to be downwards a little bit, blur the absolute crap out of it so it's nice and soft and then uses to feed either a really low opacity black solid, or even just a color effect to dim that area of the background a little bit, and you can make a fake shadow that goes in the direction of the light of your comp, because that's another area where things can look really weird, right?
01:51:59:11 - 01:52:24:09
Joey
If the light is coming from the left side of the screen on your background and coming from the right side of the screen on your subject, that's never going to look right. You could play a little bit with like the really cool relighting tool, again, giving it your matte you've already made so it only affects the subject or you could play with it on the background, but you might not be able to get what you want just with that.
01:52:24:10 - 01:52:51:09
Joey
But you could do power windows gradients on the background to kind of emulate the lighting direction of the foreground if you want to, or depending on the person, maybe flip the background or flip the person. Just think about different, you know, look at the scene and just think, how can I sell this shot? And then think, now that I've got the background in the foreground separately, and I have this great mat that I've already spent all this time making, can I do it with a manipulation of the background, if I do, with manipulation of the foreground?
01:52:51:13 - 01:53:00:11
Joey
Or can I do it using something I build with this mat that I've already gotten my node tree ready to go. In reality, it's usually a combination of all three.
01:53:00:13 - 01:53:21:17
Robbie
The last thing I want to ask about and then I'm going to wrap this up. I keep saying that, but this is really the last question. You've tried you've really, really tried and you're not getting the results that you want. What it. And so you've said to yourself or to the client, hey, look, we need I need to focus on color correcting this.
01:53:21:19 - 01:53:41:16
Robbie
I tried as much as I could with my skills. I need to hand this off. What does that look like? If you're handing off keying work to a dedicated visual effects person, what are you giving them for success? What are you asking for? You know, back from them? Is it a composited image? Are you asking for the different components?
01:53:41:20 - 01:53:48:02
Robbie
Like just speak to that briefly. How those that hand off works in both directions?
01:53:48:04 - 01:54:10:03
Joey
Again, it's all very project dependent, but ideally you're going to have a conversation with the VFX artist or department. Hopefully you can all be on the same page color workflow wise. If you're working in ACS, that's really good because I can give them an ACS plate of the foreground and of the background, and they know they can work in ACS.
01:54:10:08 - 01:54:32:01
Joey
They can preview under an ACS transform, they can get client approval underneath transform. They can send me back in ACS image of the whole comp. I would rather get the whole comp because like we talked about, there's so many things that you can do to sell the comp by manipulating the foreground background together. If you're if it's such a hard comp that you're not doing it, you're sending it out for VFX.
01:54:32:03 - 01:54:57:13
Joey
You don't want to limit what the VFX artists can do, right? So we want to give them basically in an idea. In my ideal world, ACS everything foreground background, or it might be a background that they're making. So in that case just foreground and they'll give me back an ACS image. But if possible, I'd also love a high contrast matte from them.
01:54:57:17 - 01:55:13:06
Joey
So if I do need to do some stuff to integrate it into the rest of the grade, I'm not power windowing, something that he already did a very intricate matte for. Not always a possibility for every workflow, but it can be really useful.
01:55:13:07 - 01:55:14:15
Robbie
Yeah.
01:55:14:17 - 01:55:15:21
Joey
If that works.
01:55:15:23 - 01:55:33:13
Robbie
Yeah, the idea of, you know, layer the Zeus crypto mattes, that kind of stuff comes to mind because I think that is, you know, that's the hard part here is creative. It's not the color you're likely pretty good at the color work. Right. But I like if it's that keying works, especially with a lot of high motion.
01:55:33:15 - 01:55:55:02
Robbie
We didn't even mention motion blur, by the way. That can be a real difficult thing to deal with, in greenscreen work. So you want to try to as much as you can, eliminate some of that motion blur. But, I agree, getting some of the matte set back, I think with the hand off to the effects, the one thing I always think of is okay, but when you get to that point, you've probably already done some thinking or some work about the color correction, right?
01:55:55:04 - 01:56:15:20
Robbie
So the one thing that you might want to have and part of that handoff discussion, aces or whatever, is some sort of viewing transform that they can look at your your color work in context. Right. And that is the important thing to understand about that is that that's not something you want to bake into the shot. So if you're doing a handoff of the green screen work, you don't want to bake your grade into either.
01:56:15:20 - 01:56:34:01
Robbie
The foreground or the background plates. You want to give that to them as clean and as as as raw as possible. But if you've already done some color work, you can hand that off as you know, some sort of transform a lot or whatever, and go, hey, while you're working on this, you can put this in line in your pipeline to view with what I have in mind.
01:56:34:05 - 01:56:45:19
Robbie
So when when they render out, they take that off. And guess what? You just reapply that color, work back on your end and Bob's your uncle. It's now like you have the same look but with the key work in place.
01:56:45:21 - 01:57:03:15
Joey
Last thing I mentioned in this process, because a lot of clients don't understand this, especially clients that don't do a lot of visual effects and a lot of keying and a lot of tracking. Is frames matter like they might be like, oh, can we get this back with hand with like 12 frame handles? That's fine for a grade normally.
01:57:03:17 - 01:57:21:06
Joey
But if I'm sending it off to VFX, it needs to be frame to frame and the edit and everything needs to be completely locked because you do not want that VFX artist working on frames that are never going to be used. That is literally just flushing money down the toilet. So if it's.
01:57:21:12 - 01:57:22:07
Robbie
Also also.
01:57:22:07 - 01:57:27:05
Joey
That you're getting to a VFX artist, you want to be cut to cut exactly to the frame.
01:57:27:07 - 01:57:47:20
Robbie
Yeah, yeah, exactly. I agree. So good stuff man. I think, there's a lot to digest here. And obviously I would just say, I gave it a couple resources. We'll put this in the, in the, the show notes. Couple of years ago, buddy of mine, Jeff Foster, wrote a great book. It's available, anywhere you can buy books or Kindle versions of whatever called the Green Screen Handbook.
01:57:47:22 - 01:58:10:03
Robbie
Again, this is by Jeff Foster. He really goes into a lot of, nitty gritty about production tips, and there's some other books like it, but I definitely recommend that one. I would also recommend, just the the plethora of, VFX tutorials from VFX society and other places that really dive into the nitty gritty about key considerations, you know.
01:58:10:08 - 01:58:13:01
Joey
And don't look for resolved specific tutorials.
01:58:13:03 - 01:58:29:00
Robbie
Right? That's right. Yeah, that's what I found you in fusion. You can grok so much from guys, you know, people doing, hey, I'm going to show you how to do this in nuke today or in flame or whatever. And you might not be working on those platforms, but, the, the concepts in the conceptual work is really important.
01:58:29:00 - 01:58:51:17
Robbie
Like, oh, well, flame has this really cool tool. How can I emulate that kind of thing over in, you know, fusion or resolve or whatever? And then also I would just I would just say that, in general with this kind of thing, flagging problems and, difficulty early in the process is better than later in the process.
01:58:51:17 - 01:59:13:18
Robbie
Right. You know, you mentioned tasks at the top of the show over deliver. Totally. Right. I have seen so many people just get ruined by, you know, things that they over promise that they could do. And then they go, oh, well, I can't. It turns out I can't do this. That's good to say. I was I need to write good stuff, man.
01:59:13:18 - 01:59:29:01
Robbie
I well, Jared, I hope this, this helped you out a little bit conceptually. Think about some of this stuff. And like I said, for some of the details, there are a lot of other resources, that we've, we've mentioned a few of them. Also, just so last reminder, we are all on, shows on Instagram and Facebook.
01:59:29:01 - 01:59:46:21
Robbie
You can find, announcements about new episodes on those platforms. We're also on YouTube, of course, all the major streaming platforms, Apple Podcasts, Spotify, you can always head over to the offset podcast with this link and QR code right here. That's where we, one of the places where we distribute, but also have show notes, transcripts and that kind of stuff.
01:59:46:23 - 02:00:05:15
Robbie
And then just as a reminder, it would be a really, really, really big help if you could spend 5 or 10 minutes, with our, our viewer survey, again, right here at this link right below. Take about five, ten minutes to fill this out. If you wouldn't mind doing that. That would really help us as we embarked on season three, which, we're taking a month off.
02:00:05:17 - 02:00:25:05
Robbie
This is, some of the year will be back mid January of 2026 with new, new episodes, new podcast features, all sorts of fun stuff. So, we really hope you come back in the new year and join us for future episodes. And again, thanks again for making, 2025 and the second season of The Offset Podcast.
02:00:25:07 - 02:00:45:22
Robbie
So successful. We really appreciate, all the feedback, the kind words, etc., that we received. And here's to, doing it again in 2026. So, until then, happy holidays. Stay safe. And our best, to to everybody watching, to finish out the year strong. So for the ole Offset Podcast, Robbie Carman.
02:00:46:00 - 02:00:47:19
Joey
And I'm Joey D’Anna. Thanks for listening.

Robbie Carman
Robbie is the managing colorist and CEO of DC Color. A guitar aficionado who’s never met a piece of gear he didn’t like.
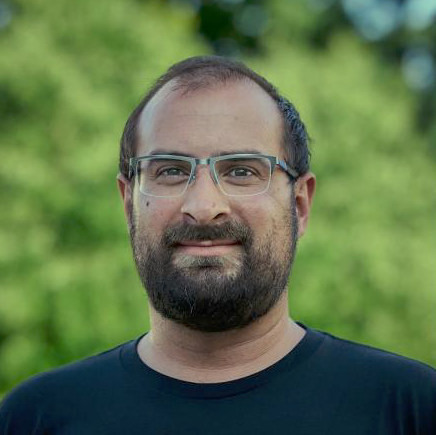
Joey D'Anna
Joey is lead colorist and CTO of DC Color. When he’s not in the color suite you’ll usually find him with a wrench in hand working on one of his classic cars or bikes

Stella Yrigoyen
Stella Yrigoyen is an Austin, TX-based video editor specializing in documentary filmmaking. With a B.S. in Radio-Television-Film from UT Austin and over 7 years of editing experience, Stella possesses an in-depth understanding of the post-production pipeline. In the past year, she worked on Austin PBS series like 'Taco Mafia' and 'Chasing the Tide,' served as a Production Assistant on 'Austin City Limits,' and contributed to various post-production roles on other creatively and technically demanding project